I also equiped the plane with a bomb drop as well as a glider tow release mechanism. The Cub had the power to tow up gliders. We found out quickly that one had to be careful the size of the gliders being towed as well as the experience of the glider pilot. One flyer had a smaller r/c glider and convinced me that he had a good release mechanism. Due to the power of the Cub, his small glider went up quickly even with a gentle takeoff speed of the Cub. He quickly lost control of his glider which flipped upside down and got drug across the ground before I could hit the release. His glider wasn't overly damaged, but I learned a great deal that day about glider towing. ( smiling )
However, I liked the super simple construction of Homer that I decided it would be a great "double sizing" project. I had several sheets of "printers aluminum" which was originally used to print newpapers from which had the consistancy a little lighter than that of beer can aluminum. I thought it would be a great project to skin Big Homer with this printers aluminum. I found super small nails at a craft store which were perfect for the task of attaching the aluminum to the airframe along with CA glue. I decided to power Big Homer with a Qudra Q-35 engine. Perfect fit!
Flight characteristics of Big Homer were predictable and fun to fly. However, the more time in the air, the more it experienced glitching. The problem was identified as static electricity building up on the flight surfaces. The discharge of this static electricity cause receiver interference and control glitching. For the second flight, I attached braided wire streamers from the wings and horizontal tail control surfaces. This helped some, but eventually the static electricity would accumulate again. The third and final flight, as these images depict, did not end well for Big Homer. It was later recommended that I should have installed a ground wire at the base of the receiver antenna to the aluminum skin. Oh well, sounded like a good plan, but it came a little too late. Still, it was a fun project, both the small and big ships.
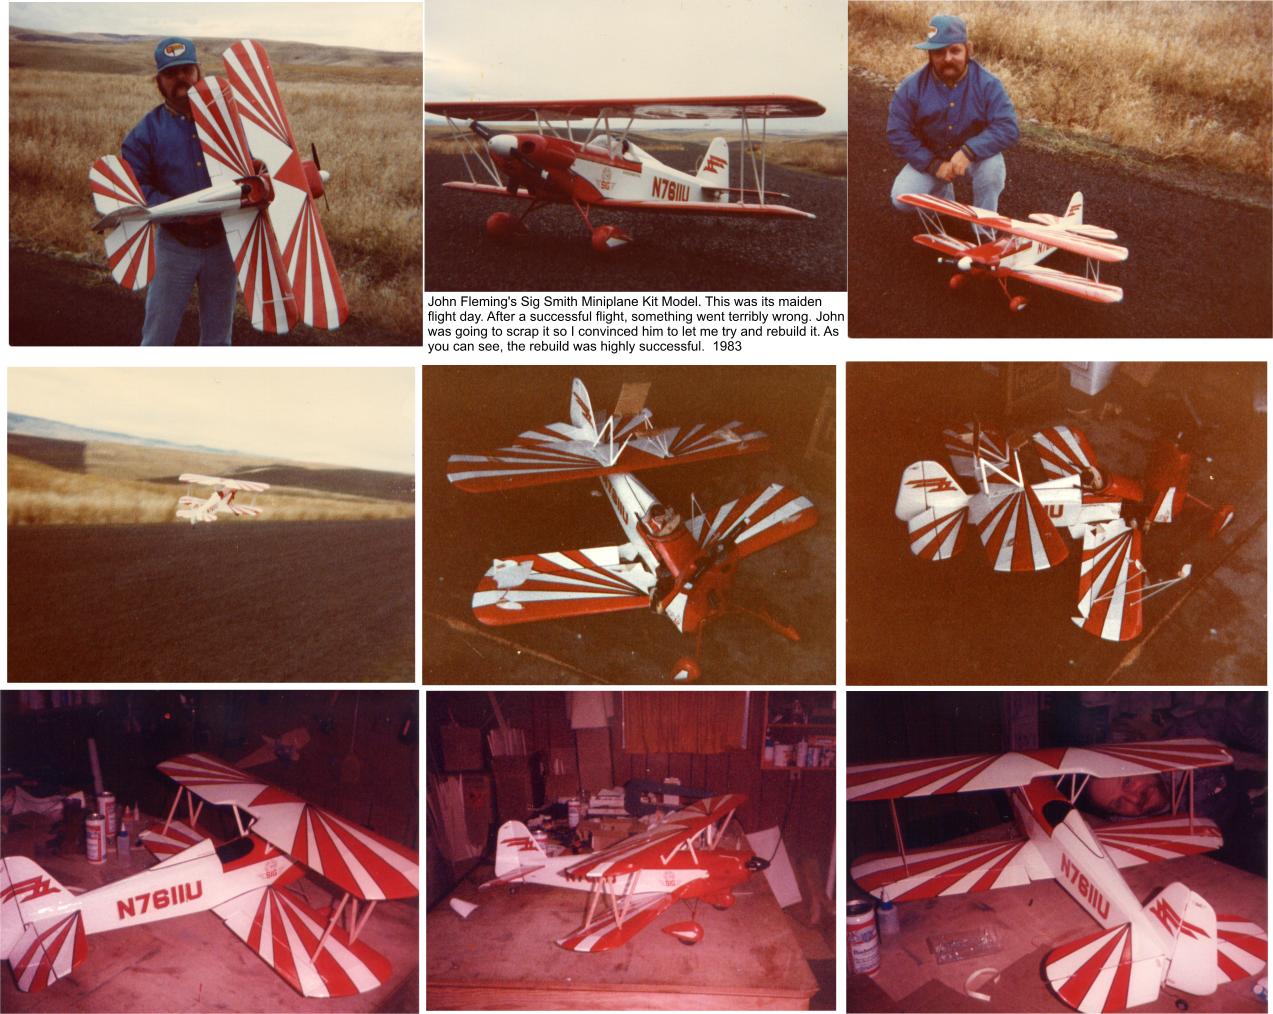
Needless to say, John was wasn't too happy. He was convienced that it was a total loss and was going to scrap it. I looked at it and told him that if he was going to scrap it, then he wouldn't mind if I made an attempt to rebuild it. We loaded it up in my car and a few months later, the Smith flight was worthy again.
This was another model project where I used my trusty dial calipers and scaled up the plans in the magazine article. It turned out to be another successful up scaling. The Headmaster being a full symetrical wing foil, is rock stable. It truly is a fun model to build and fly. Top Flight kitted the headmaster at one time, but it is currently a "discontinued" kit. However, I believe the plans are still available through RC Modeler Plans pl-802. These photos of the Headmaster reveal my successful attempt at molding my own cowls. This technique starts with creating a mold plug. Then using the kitchen oven, heating a sheet of plastic to where it slowly conforms to the plug. As seen here, I made a circular plastic holder which is more for adding a little weight to the plastic as it heats up. I created two cowls for the Headmasters which both turned out better than I expected.
At one time, I had seriously considered "double sizing" the Headmaster which would have been a 118 inch wing span. While cleaning out the house, preparing to sell it, I discovered a sheet of large full symetrical wing rib and fuse templates. So many years have passed, I forgot all about this sheet. Looking closer, it was apparent they were for the "double size" Headmaster.