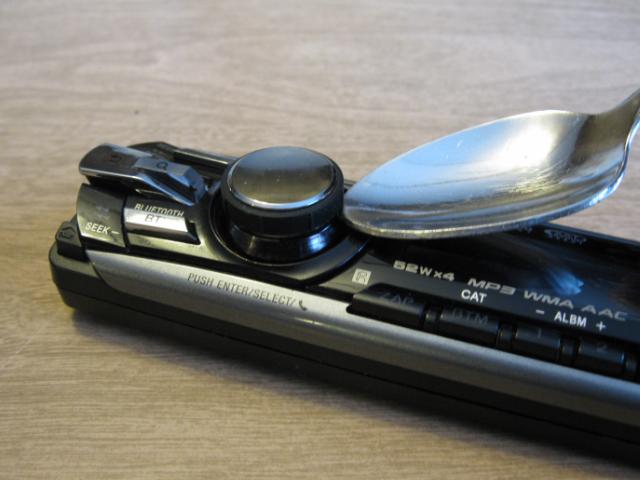
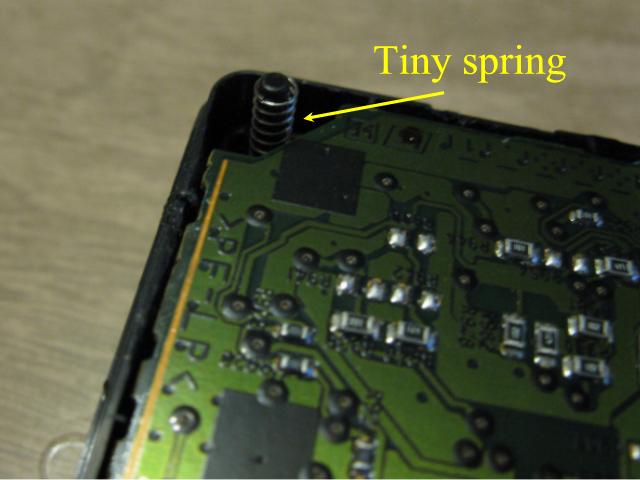
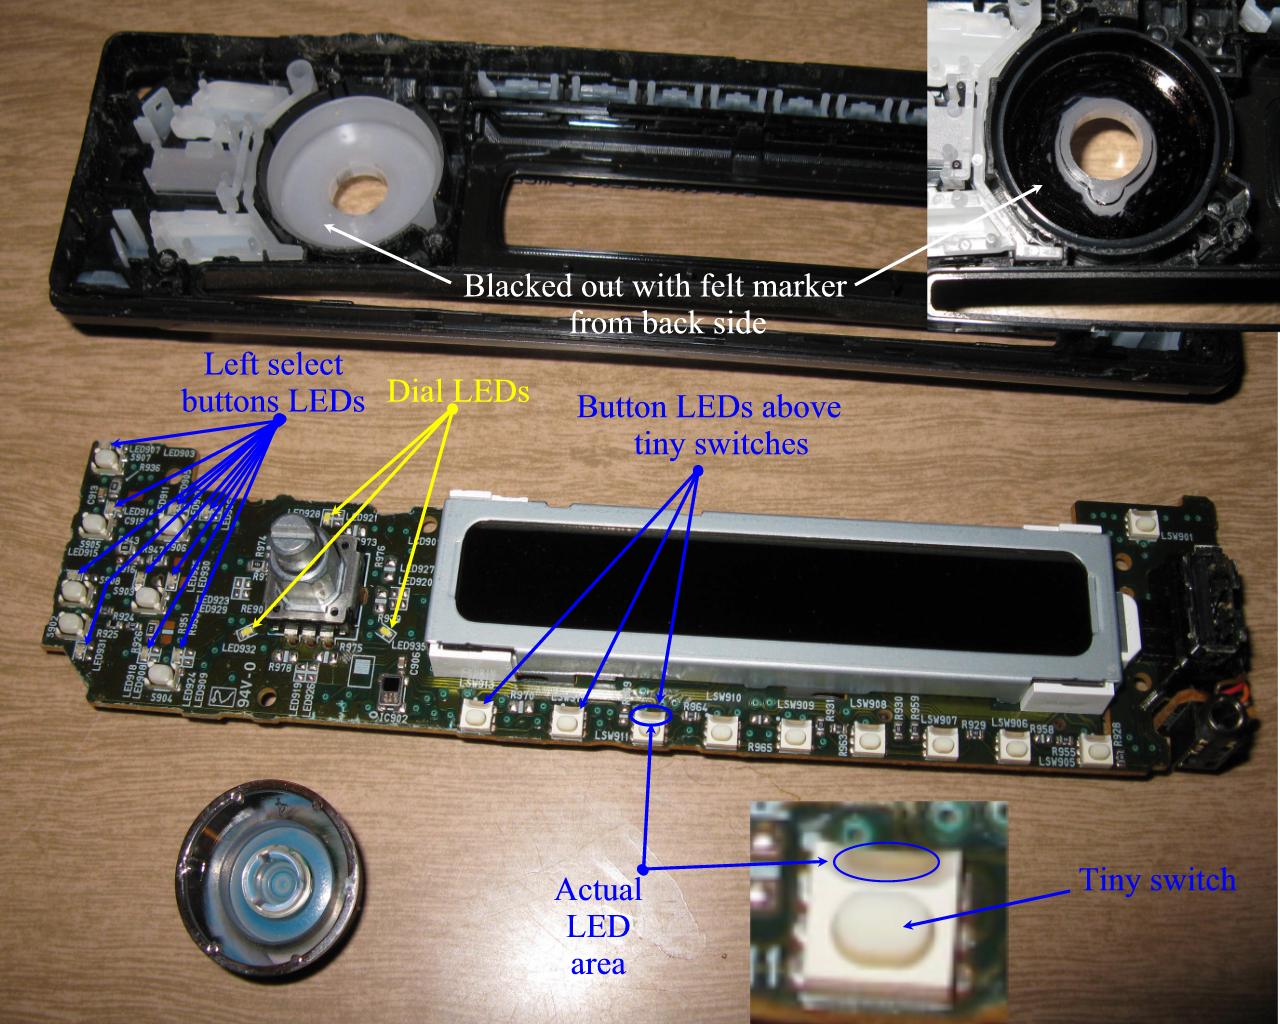
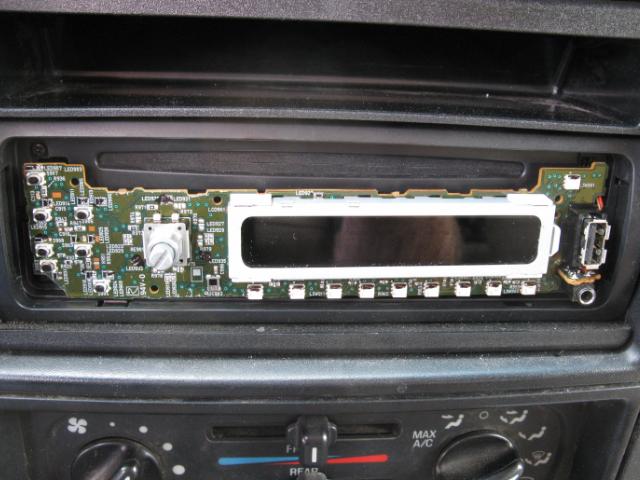
Sony MEX-BT3700U Bright Display ModificationUsing this information voids the warranty! You assume FULL responsibily!!I purchased the Sony MEX-BT3700U car stereo and later discovered the display to be too bright during nighttime operation. I share this information to correct the problem. This information deals with my experience "only" with this model: MEX-BT3700U. I've had no experience with other or simular Sony units. Tools required: a small phillips screwdriver, a teaspoon, new black felt marker This modification is quite easy but requires careful disassembly of the faceplate unit. The absolute first step is to "carefully and slowly" remove the dial knob. The circuit board will not separate from front plate if the dial knob has not been removed first. I rocked the knob side to side "gently" but with firm and constant upward pressure. I later found using a teaspoon just under the rubber ring and gently prying up, rotate knob a bit, gently prying up, rotate knob... etc. worked quite well. I rotated knob this way several times before it released. Once the knob has been removed, I flipped the faceplate over and removed the five screws from the back which holds the assembly together. Before going further, I identified which corner the "release button" is on. There's a tiny spring associated with the release button and is located inside between the button and backplate. Careless disassembly, this tiny spring is sure to disappear! I lost it two times, I lucked out and found it both times! Continuing, keeping the "knob side" facing down, with a sharp knife inserted in the seam, I carefully twisted to unsnap the back plate from the front plate. At this point, it is probably best to be mindful of static electricity. I would be touching parts of the printed circuit board which could be damaged by static electricity. I grounded myself out before removing circuit board. Once the back plate is removed, I carefully lifted out the circuit board. WHERE'S THE SPRING??? I kept the faceplate pointing down so all pieces wouldn't fall out. Not a big deal, the pieces easily go back where they came from. With the circuit board removed, using a magnifying glass, I looked closely for the tiny LEDs. I've included this image of the circuit board front with markup showing most of the LED locations. With a new felt marker, I started out by blacking out only half of each LED then reassembled unit less dial knob. I had no idea just how bright these tiny pieces of silicone could be... I didn't put a dent in the brightness level! I had to disassemble the unit again with a new mission. I ended up carefully attaching circuit board to base unit electrical connector without back or front plates and with felt marker in hand, turned the key on. I did this while it was dark and got the full effect of those tiny little buggers. The tiny LEDS are blinding, totally incredible the amount of light they emit! The three LEDs around the dial post are white while the remainder LEDs are a pretty blue. While the circuit board is powered up, with felt marker, I blackened out the LEDs to my brightness level liking. These little buggers aren't easy to cover up. With patience, and re-dabbing, these tiny LEDs can be dimmed down. Also, I blackened out the back side of the white dial ring to make sure it will no longer emit its blinding white light. When I was satisfied with my handi-work, I turned off ignition and opened door to kill power to circuit board before removing it from base unit electrical connector. I reassembled the faceplate unit and pushed the dial knob back on. I am now totally happy with my Sony MEX-BT3700U stereo unit. It is no longer a blinding light driving hazard. UPDATE 12-16-2010Recently, I received another email from Marco Dirkx sharing his experience with a Sony MEX-BT3800U. He indicated minor differences between his and the Sony MEX-BT3700U and ultimately had a successful and very interesting modification to his unit. With Marco's permission, I have included his email message and photo describing his experience. I really liked the transparent foil idea. Very cool! As I replied to Marco..."Now I'm starting to rethink this bright light situation. Seeing these creative solutions, maybe Sony ultimately gave us a platform to "personalize" these units. (smile)" It was great to receive your creative approach to your MEX-BT3800U modification, Marco. Thank you, sir!!
UPDATE 11-17-2010I received an email from Joost van der Linden sharing the changes he applied to his Sony MEX-BT3700U. With his permission, I include his email message along with photos he took demonstrating the effects of his modification. As I replied to Joost, "had I not been so frustrated with the blinding white light and my ultimate desire just to blot it out completely, I would have preferred your application of the "blue" marker rather than the black marker I used on mine". As I shared with Joost, I was very much impressed with the "dark blue" effect he achieved with his approach to the problem. The dark blue effect is very appealing and I would recommend others attempting this change to go with the "blue" marker application first as Joost has done with his. I greatly appreciate you sharing your solution, Joost. I'm sure others will much prefer your "blue" approach. Thank you, sir!!
|